INTRODUCTION
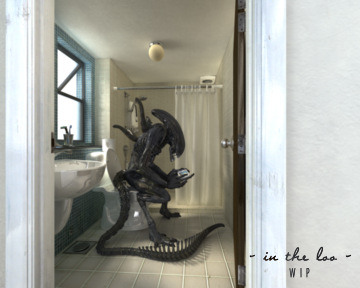
Therefore, I've decided to use this topic as my first idea for a series of images using the Alien as the main character. Ladies and gentlemen, babies and elephants, I present to u, Alien A.S.O.V.U.S.! (A Series Of Very Unlikely Situation). The first image here is entitled "In The Loo". As the title suggests, we see our friend here doing his business in the toilet and playing a psp while he's at it. A good reminder for you peeps out there, always close and lock the door when u r using the toilet! I hope you like it. Please feel free to drop me any comments or feedbacks.
I have a few more ideas in my mind to add into the series of unlikely situations for the alien, but if u have any ideas, please let me know too! I'd work on them in my free time (if i have any, lol!)
between job breaks. Read on for the making of.
THE MAKING OF
TECHNICAL INFO
Software used: Softimage XSI 7.5, Photoshop CS3, Nik Color Efex Pro 3.0 (PS plug-in), Digital Fusion.
Textures mostly from cgtextures.com and mayang.com.
IDEA
The idea came to me when i finished the Alien character in late June. I posted some images of the Alien on a simple grey limbo background to the CG community, and a lot requested me to put him in an environment instead. So I thought to myself, yeah, doing a Giger-esque environment will be cool. I even thought of doing a still image which simulates an FPS game. Sort of like it's viewed from a colonial marine's point of view, with aliens menacing and trying to attack you(the marine). Can you picture it? Anyway, while it sounds cool and challenging, I find that the final image will not differ from any of those you often find on the internet search engines. I wanted to do something different. Something comical. Something never seen before. Hence the idea of putting the Alien into funny and silly situations came into my mind.
GOAL
The objective of this project is to learn more on how to create realistic rendering using FG(Final Gathering) and GI(Global Illumination). I wanted to try out Irradiance Particles initially but it seems XSI would crash whenever i make a render. So in order to create a realistic image, I had to make sure that the modeling and texturing had to be accurate. The lighting had to be believable too so that it feels natural to the viewer.
KICKING IT OFF
Fun fact: the toilet in the image is based on a real one which is just next to my studio. I use it
everyday, so it is easy for me to look for references. I modified the toilet and took out stuff which i thought would make the compositiong messy. For example, there should be a tap in between the basin and toilet, and also a few towel hangers attached on the right side of the wall near the shower curtain.
MODELING, TEXTURING & LIGHTING
I started out by modeling the toilet first. The toilet is like the supporting character in this image, as the alien will be sitting on it, so i had to put in as much details to it as i can. When it is done, I continue to block out the room's space, making sure it is proportional to the toilet and also identical to the real one (which is next to my studio). Once i am satisfied with the basic structure of the room, i proceed to do a test rendering using FG + GI.
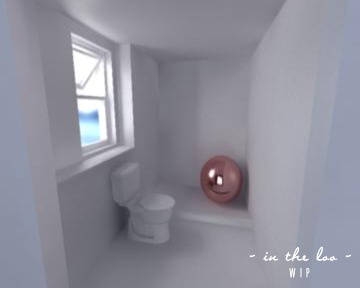
I continue to adjust the intensity of the rays to get the right mood and lighting, while adding more props into the room at the same time. For this image, i wanted to simulate the time of the morning with a clear weather outside. The floor should be brightly lit and the room should show a fair contrast between the bright and dark areas. To achieve this, i used two area lights. One fo
r the sun(key light) pointing into the room at a diagonal angle from outside the window. Another one to simulate the bounce light or the blue sky's illumination from outside the window coming into the room.
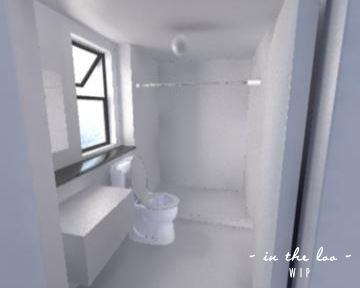
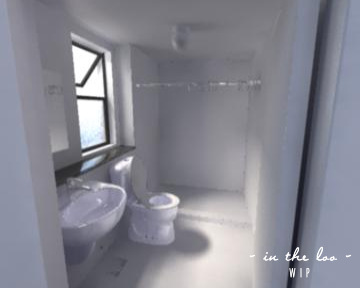
Once the lighting is fixed, i continue to model more toiletries and begin to apply textures onto them, one at a time. Slowly, we see the whole room coming together piece by piece. The curtain is done by using XSI's cloth simulation.
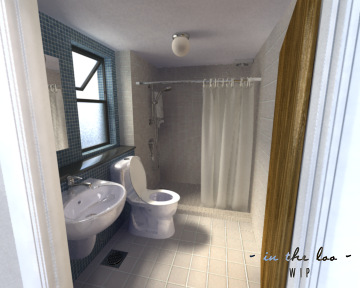
By now, the toilet is almost done, so i imported the Alien character in. At this time, i still do not know what i wanted to Alien to do yet, so i just roughly pose him sitting on the toilet, and do another test render.
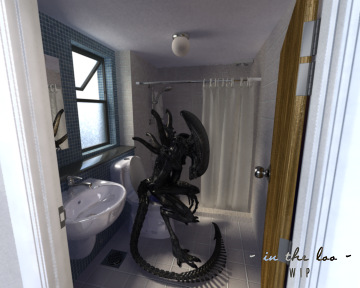
The character's model made a huge difference to the lighting. Everything went dark. I had to adjust the light's GI ray intensity to get back the mood that i achieved earlier. Also, the textures on the character had to be brighten up for this scene.
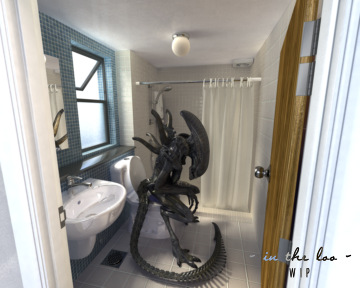
At the current pose, the tail kind of look stiff to me. I purposely curl it back up to point at the hand where it will be holding the psp but it just doesn't look natural. As a result, i had to readjust the tail to the final pose in the image where it looks and feels more like a tail.
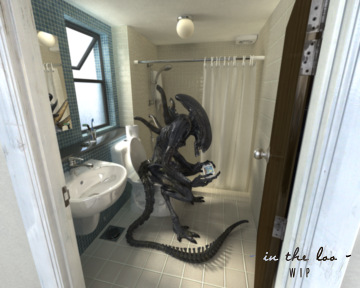
For final touches, i added some worn and dirt textures to the tiles so that it doesn't look too clean. Then, i readjusted my camera to get a better composition as the thought of putting in the titles/supers came into my mind.
RENDERING
Finally, it's time to render! Firstly, i rendered a GI and FGmap at low resolution (360 x 288). This is to help save time as rendering the GI and FGmap at hi res would take a long long time. Then, i render the full image at 1440 x 1152 using the freezed GI and FGmap.
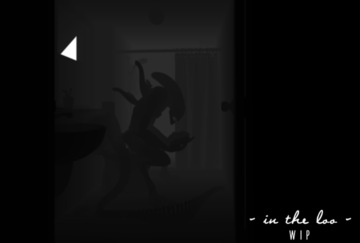
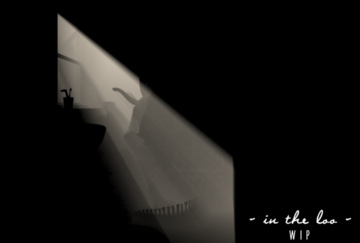
Now, i had to render the volumic light pass separately with FG and GI off, and everything given a black lambert material. The fog pass was done with an open GL capture from the viewport, with the display settings for fog is enabled.
COMPOSITING
Now that i have all the passes rendered, i bring them into Digital Fusion for compositing. Prior to that, i used Nik Color Efex Pro 3.0 to make slight color adjusments to the image.
The wall which is holding the door doesn't look too good. The texture is blurry and bump maps don't look right. Since the wall is facing dead front, i didn't pay too much attention to it in 3D. I fixed this by cropping the image right to the edge of the door frame, and used a wall texture image to replace the old wall. Now, it looks much better!
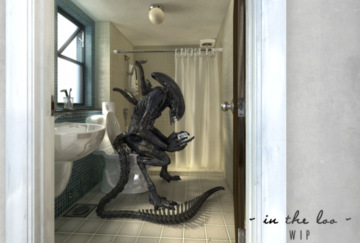
Next, i added the fog pass to make the room a little brighter and at the same time, give it a little depth. Then comes the volumic light pass. I masked it so that the light does not shine all the way down to the ground. It is gradually masked right until it reaches the character's back. I find this pass quite useful as it helps the overall composition by directing the attention to the character.
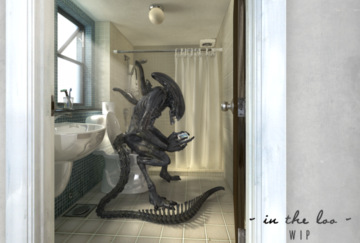
After this is done, i added dust particles using the S6 Snow effect in Digital fusion. These particles are only visible in the volumic light. Finally, i sharpen the image a little and add some grain to it.
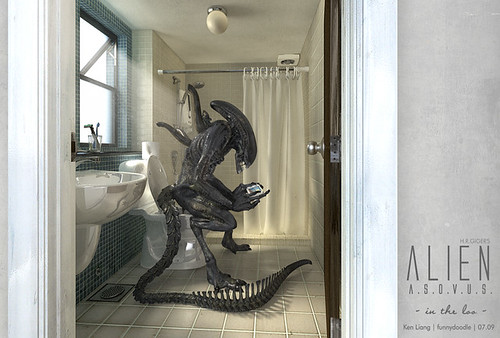
CONCLUSION
I hope you enjoyed reading this article as much as i enjoyed writing it. I hope to see you guys again in the near future with more CG work. If you have any questions or comments, don't forget to post them or email them to me. Till then, see ya!

You got some skill! Great stuff
ReplyDelete